
Clay earrings can be as simple or as intricate as you want. Jewelry is a fun and unique way to use creative expression, as there are my different types and styles. In this post, I’ll teach you how to make some simple polymer clay earrings!
Remember, each brand of polymer clay is different, so be sure to set your oven to the appropriate temperature. I use KatoPolyclay the most often and bake all of my earrings at 300 degrees Fahrenheit for 30-35 minutes.
Let’s run through the basics of Earring design before I show you the earrings that we will be making in this tutorial.
Creative Concepts
I try to start with a color palette and a concept sketch before I begin making a new pair of earrings. This is similar to how I also begin designing your custom orders. I tend to choose more pastel or muted colors as they are my personal preference, but your inspiration can be drawn from any aspect of your life and imagination.
Just let your creativity flow during the design process, it’s very common for me to sketch up many designs and color palettes before choosing one to create. Sometimes if I am stuck in a creative hole, I have a look at the styles I’ve already made, and look for ways that I can improve, or alter them. Folk art and colors from around the world are also a huge inspiration for me. I have traveled to many places, and I’ve fallen in love with the cultural art from just about everywhere I’ve been.
Preparing your Clay
Once you have settled on a color palette and design, it’s time to prep your workspace. I like to preheat my oven ahead of time so that by the time I am finished making a pair(or pairs) of earrings, they can just go straight into the oven to cure.
I like to use a porcelain tile, or silicon craft mat to roll and condition my clay. Make sure, you’ve cleaned your workspace and grabbed all of the colors you will be using or mixing. Then make sure you have all of your additional tools, such as silkscreens, paint, needle tools, and dotting tools. Once you have your clay conditioned, it’s time to put your design in the flesh.
Polymer Clay Earrings Tutorial
For this tutorial, I’m going to show you how I made the “Hannah” earrings. These earrings are one of my favorites, and they are very simple to make, but the result is stunning.

Materials
There are lots of different types of materials that can be utilized when working with poylmer clay, but we will only need a few in order to make the “Hannah” earrings! Some of the tools you will want to have on hand for this tutorial include:
- Earring hooks or posts
- jump rings
- acrylic roller or clay press (for conditioning the clay)
- Clay cutters or shaping tools
- baking sheet or porcelain tile
- oven or toaster oven
- Silkscreen
- paint
- old giftcard, or silicon brush
- old wood cutting board
- dremel tool
Let’s begin!
Step 1: Choose Your Clay
Polymer clay is available in a wide range of colors and finishes, so choose the clay that best fits your style and project. To start I’ll be using a pink clay that will have a matte finish when baked.
Step 2: Condition Your Clay
Conditioning your clay is an essential step in working with polymer clay. This process involves softening the clay and making it more pliable. To condition your clay, knead it in your hands until it is soft and smooth. If your clay is hard, you can also warm it up by placing it in a plastic bag and letting it sit in warm water for a few minutes.
Step 3: Roll Out Your Clay
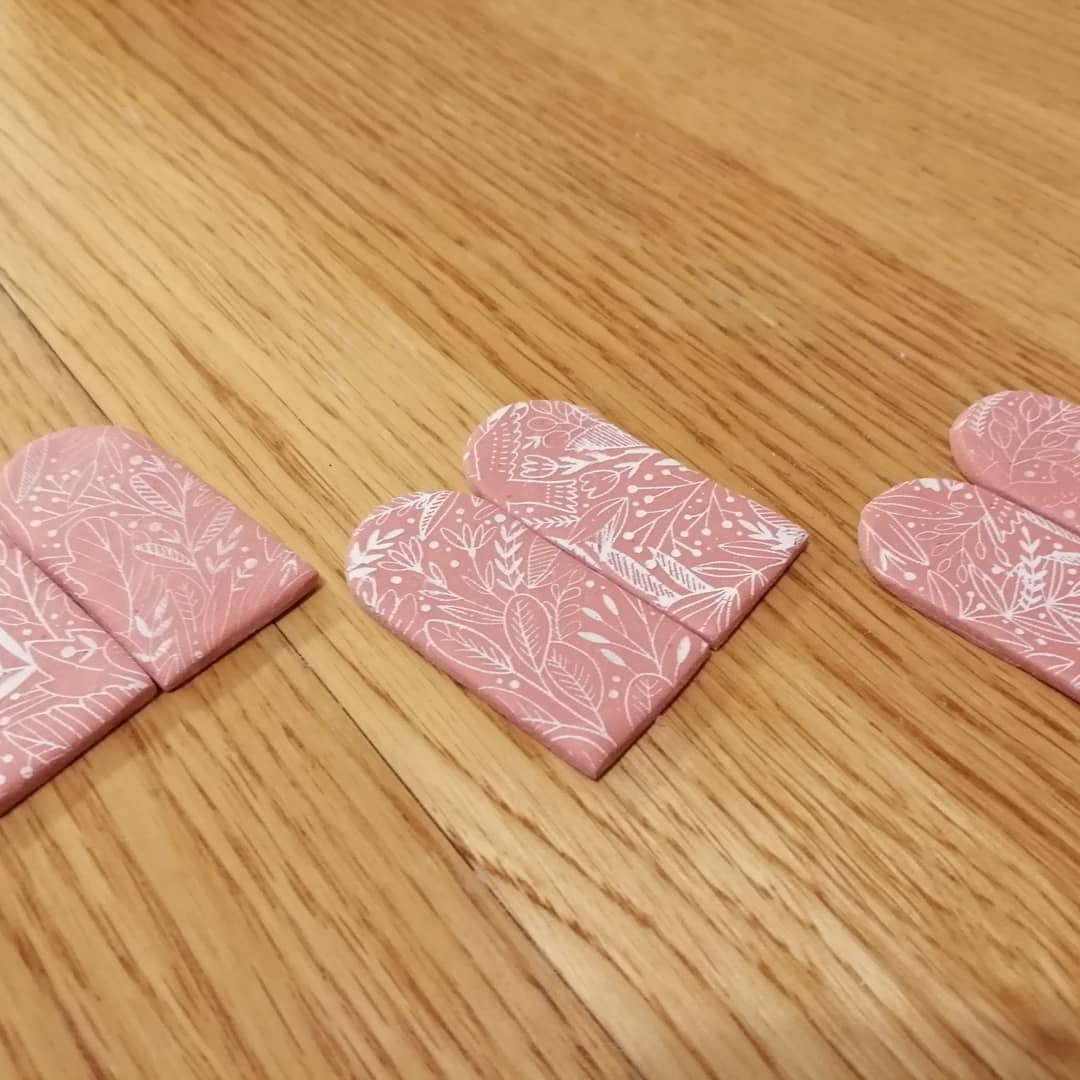
Place your conditioned clay on a piece of parchment paper and use a rolling pin to flatten it out to your desired thickness. If you’re making earrings, aim for a thickness of around 1/4 inch. Once the clay is rolled out, I add the tropical silkscreen to the clay, and coat it with paint, and then remove.

Step 4: Cut Out Your Shapes
Once the paint from the silkscreen is dry, use a clay cutter or knife to cut out the desired shape of your earrings. You can make any shape you like, from simple circles to more intricate designs. For “Hannah” i’m using a simple arch cutter, the shape is elegant, and it allows for the silkscreen design to be easily seen.

Step 5: Add Details
If you want to add texture or detail to your earrings, now is the time to do it. You can use stamps, texture plates, or even your fingers to create interesting patterns and designs including faux hammered metal, and stone or cement-like textures. “Hannah” requires a smooth surface for the design to be visible, and to allow the liquid clay to adhere properly.
Step 6: Bake Your Earrings
Before baking your earrings, you’ll need to add the liquid clay to coat and seal the paint so that it does not flake off the clay after the earrings are baked. This ensures that the earrings maintain their sleek appearance for a long time. Follow the instructions on your polymer clay package for baking your earrings. I bake most of my Sculpey and Kato Polyclay at 300 degrees farenheit for 30-35 minutes, but of course the temperature varies depending on the brand. Once they are done baking, let them cool completely before handling.

Step 7: Add Your Hardware
Pull out a piece of wood, or an old cutting board, and use a small dremel tool to drill a hole at the top of your earring. Make sure to center the hole before drilling! Sometimes it is easiest to mark where you want the hole with a pencil, before you start. Once you have the holes made in both earrings, insert your jump rings and attach your earring hook or stud post to the jump ring, making sure it is secure.
Step 8: Add Finishing Touches
Once your earrings are cooled, you can add any finishing touches you like. You can add a coat of varnish for a glossy finish or leave them as-is for a matte look. I like to sand off the rough edges of the earrings that occur from the cutting process, to smooth down the edges and enhance their appearance.

Congratulations, you’ve just made your own pair of polymer clay earrings! “Hannah” is a simple, and basic design that looks sleek and sophisticated. With a little creativity and some basic tools, the possibilities with polymer clay are endless!
XOXO
-Sofie